Overview of coDiagnostiX V10.10
Table of Contents
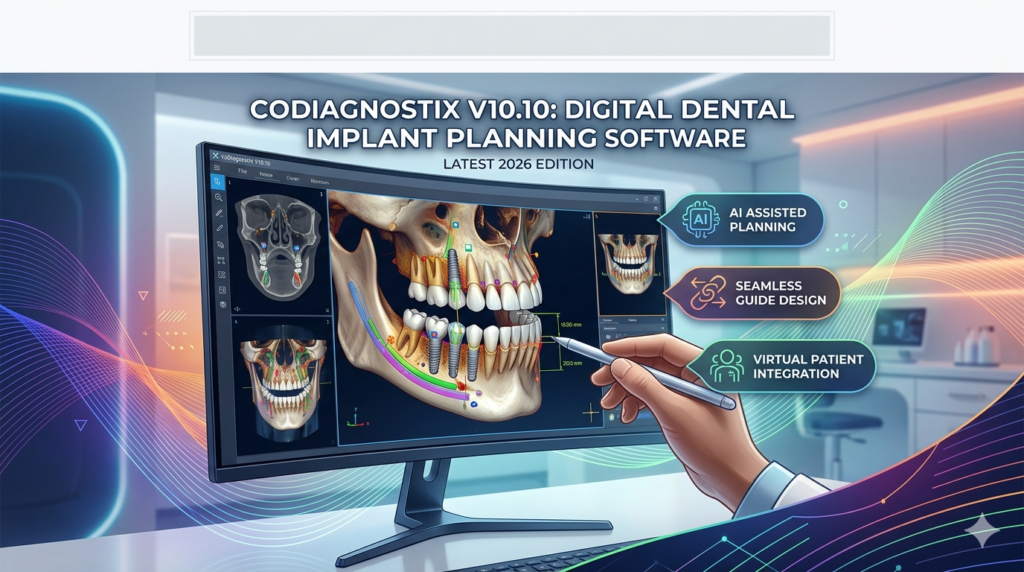
coDiagnostiX V10.10 is a specialized digital dental implant planning software developed by Dental Wings. It enables dentists, oral surgeons, and prosthodontists to perform 3D implant simulations, CBCT data segmentation, and surgical guide design with high precision.
Unlike general CAD tools, coDiagnostiX is specifically built for restoration-driven implantology, meaning the final crown guides the implant position from the start. Version 10.10, released in late 2025 and updated for 2026, focuses on workflow automation, AI-assisted bone analysis, and enhanced DICOM-STL fusion.
This software is used globally in private clinics, university hospitals, and dental labs. It is legally licensed through subscription or perpetual plans from authorized Dental Wings distributors. This article does not promote or support any form of unauthorized use, crack, or license bypass.
Key Features of coDiagnostiX V10.10
coDiagnostiX V10.10 includes both core and advanced modules. Below are the primary features:
-
Restoration-driven planning – Import STL files from intraoral scans (e.g., 3Shape, Medit, iTero) and align them with CBCT (DICOM) data.
-
3D bone density visualization – Color-coded Hounsfield unit mapping for selecting optimal implant sites.
-
Virtual implant library – Supports over 150 implant systems (Straumann, Nobel Biocare, Dentsply Sirona, Zimmer, etc.).
-
Surgical guide design – Create tooth-supported, mucosal-supported, or bone-supported guides for 3D printing or milling.
-
AI nerve detection – Automatic mandibular canal tracing (accuracy improved in V10.10).
-
Dynamic simulation – Check collision with adjacent teeth, nerves, and sinuses.
-
Prosthetic preview – Immediate visualization of the final restoration.
New semantic entities: CBCT segmentation, Hounsfield units, DICOM viewer, STL alignment, guided surgery, 3D printing workflows.
What’s New in coDiagnostiX V10.10 (2026 Update)
The latest version introduces several improvements over V10.0 and V9.5:
-
AI-assisted bone margin detection – Reduces manual outlining time by 40%.
-
Faster DICOM import engine – Handles high-resolution CBCT files (up to 1024×1024) in seconds.
-
Improved implant torque simulation – Predicts primary stability based on bone density.
-
Direct export to 3D printers – Native .stl and .3mf support for SprintRay, Formlabs, and Asiga.
-
Cloud collaboration module – Share cases with lab technicians (encrypted and GDPR-compliant).
-
Updated implant library – Includes 2025–2026 implant models from leading brands.
No activation bypass, crack, or keygen is required or supported. Users must authenticate via a valid license.
System Requirements for coDiagnostiX V10.10
Before installing, ensure your hardware meets the following minimum and recommended configurations:
| Component | Minimum Requirement | Recommended for 2026 |
|---|---|---|
| OS | Windows 10 Pro (64-bit) | Windows 11 Pro |
| CPU | Intel i5 (8th gen) | Intel i7 (12th gen) or AMD Ryzen 7 |
| RAM | 16 GB | 32 GB |
| GPU | 2 GB dedicated (OpenGL 4.5) | NVIDIA RTX 3060+ or AMD equivalent |
| Storage | 50 GB SSD | 256 GB NVMe SSD |
| Display | 1920×1080 | 2560×1440 (27″+) |
| Other | USB for license dongle (optional) | Internet for cloud features |
The software does not run on macOS natively but works via Parallels or Bootcamp with certified hardware.
Installation Guide for coDiagnostiX V10.10
Follow this step-by-step legal installation process:
Step 1 – Obtain a Licensed Copy
-
Purchase from Dental Wings or an authorized distributor.
-
You will receive a license key or a hardware dongle. No cracks or keygens exist for safe updates.
Step 2 – Download the Installer
-
Log into your official Dental Wings account.
-
Download
coDiagnostiX_V10.10_Setup.exe(approx. 4.8 GB).
Step 3 – Run Installation
-
Right-click and select Run as Administrator.
-
Accept the license agreement.
-
Choose installation path (default:
C:\Program Files\DentalWings\coDiagnostiX).
Step 4 – Activate License
-
Launch the software.
-
Enter your license key or connect the USB dongle.
-
Online activation requires an internet connection once every 30 days.
Step 5 – Update GPU Drivers
-
Download latest NVIDIA Studio or AMD Pro drivers for stable OpenGL rendering.
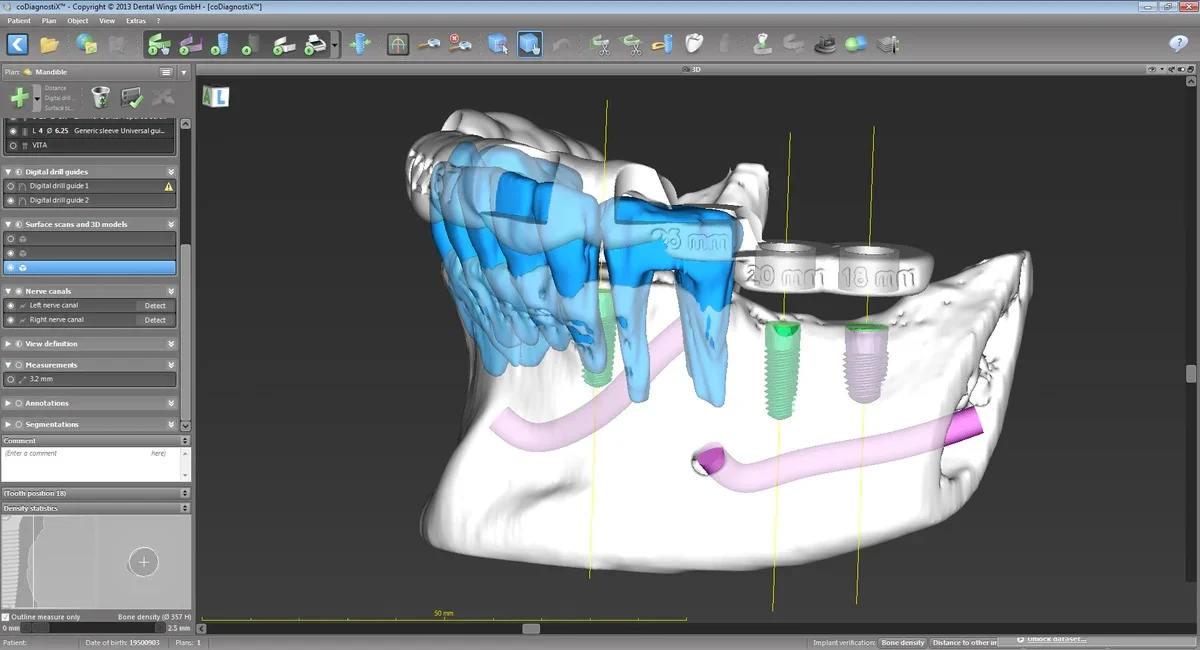
How to Use coDiagnostiX V10.10 – Clinical Workflow
This section follows a real clinical use case: single missing tooth #46 (right mandibular first molar) .
1. Import Patient Data
-
Load CBCT (DICOM) and intraoral STL files.
-
Automatically fuse both datasets using the surface matching tool.
2. Segment Anatomical Structures
-
Use AI nerve detection to trace the inferior alveolar canal.
-
Mark the sinus floor (if maxillary case).
3. Place Virtual Implant
-
Select implant system (e.g., Straumann BLX 4.8mm x 10mm).
-
Position based on bone density and prosthetic space.
4. Design Surgical Guide
-
Choose guide type: tooth-supported.
-
Add anchor pins.
-
Export as
.stlfor 3D printing.
5. Generate Report
-
Create patient-friendly PDF report with 3D views.
-
Export plan for navigation systems.
Pro tip: Use the torque simulation to avoid implant failure in soft bone (type D3/D4).
Best Use Cases for coDiagnostiX V10.10
This software excels in the following clinical scenarios:
| Use Case | Why coDiagnostiX |
|---|---|
| Full-arch immediate loading | Restoration-driven planning for fixed detachable prostheses |
| Posterior mandible with nerve proximity | AI nerve tracing avoids paresthesia |
| Sinus lift cases | Sinus segmentation and graft simulation |
| Orthodontic mini-screws | Precise placement between roots |
| Teaching in dental universities | Step-by-step simulation mode |
Non-clinical use: Dental labs can design surgical guides for external clinicians.
Advantages and Limitations of coDiagnostiX V10.10
Advantages (Strengths)
-
Restoration-first workflow – Reduces prosthetic complications.
-
Large implant library – No need for separate database imports.
-
Fast AI tools – Cuts planning time from 20 to 8 minutes per case.
-
Direct 3D printing export – Avoids intermediate CAD software.
Limitations (Weaknesses)
-
Windows only – No native macOS version.
-
Steep learning curve – Requires 5–10 hours of training.
-
Higher cost – More expensive than coDiagnostiX Essentials or free alternatives (e.g., BlueSky Plan).
-
No cloud-based viewer – Remote collaboration requires third-party tools.
Alternatives to coDiagnostiX V10.10
If coDiagnostiX is outside your budget or platform preference, consider these legitimate alternatives:
| Software | Best For | Platform | Pricing Model |
|---|---|---|---|
| BlueSky Plan | Free, open-source implant planning | Windows | Free |
| 3Shape Implant Studio | CAD-integrated workflows | Windows | Subscription |
| exocad Galway | Lab-based planning | Windows | Perpetual license |
| NobelClinician | Nobel Biocare users only | Windows | Free with implant purchase |
| RealGUIDE | 3D printing-focused | Windows | Tiered subscription |
Frequently Asked Questions (FAQ)
1. Is coDiagnostiX V10.10 compatible with all CBCT machines?
Yes. It accepts standard DICOM 3.0 files from all major CBCT brands (Planmeca, Sirona, Carestream, Vatech, NewTom).
2. Can I use coDiagnostiX for zygomatic implants?
Yes, but only with the Zygoma Module (separate purchase). Standard version supports up to 35mm implants.
3. Does coDiagnostiX V10.10 require a dongle?
Not necessarily. It supports both software-based activation (online every 30 days) and hardware dongle (no internet needed).
4. Is there a free trial available?
Yes – a 14-day fully functional trial is available from Dental Wings. No crack or keygen is needed.
5. How does coDiagnostiX compare to BlueSky Plan?
coDiagnostiX has better implant library support (over 150 systems vs. ~50) and restoration-driven UI, but BlueSky Plan is free.
6. Can I export surgical guides for any 3D printer?
Yes, as .stl or .3mf. Verified printers include Formlabs Form 3/4, SprintRay Pro, Asiga Max, and Phrozen.
7. Does V10.10 support digital denture workflows?
Indirectly – you can plan implants for overdentures, but final denture design requires separate CAD (e.g., FreeSculpt).
8. Is patient data stored in the cloud?
Only if you use the Cloud Collaboration add-on with GDPR compliance. Local storage is the default.
Final Thoughts
coDiagnostiX V10.10 remains a top-tier implant planning software for clinicians who prioritize restoration-driven accuracy and AI-assisted efficiency. The 2026 updates bring meaningful speed improvements and better 3D printing integration, making it a strong choice for guided surgery workflows.
However, it is not ideal for beginners or macOS users. Small clinics on a budget should first try the free trial or explore BlueSky Plan. For high-volume centers or university teaching, the investment in coDiagnostiX pays off through reduced complications and faster chair time.
Our Paid Service
“We do not sell or provide any software. We only offer professional support services. If any software on your system is not working properly, or you are facing installation errors, crashes, or any other technical issue — just contact us. We will help you fix the problem quickly and remotely via AnyDesk. No software will be provided from our side — only expert troubleshooting and support.”