Download the Melco Design Shop 12.1.1 (Complete Digitizing Software for Embroidery Professionals) Software from this link…
![]()
Overview of the Software
Table of Contents
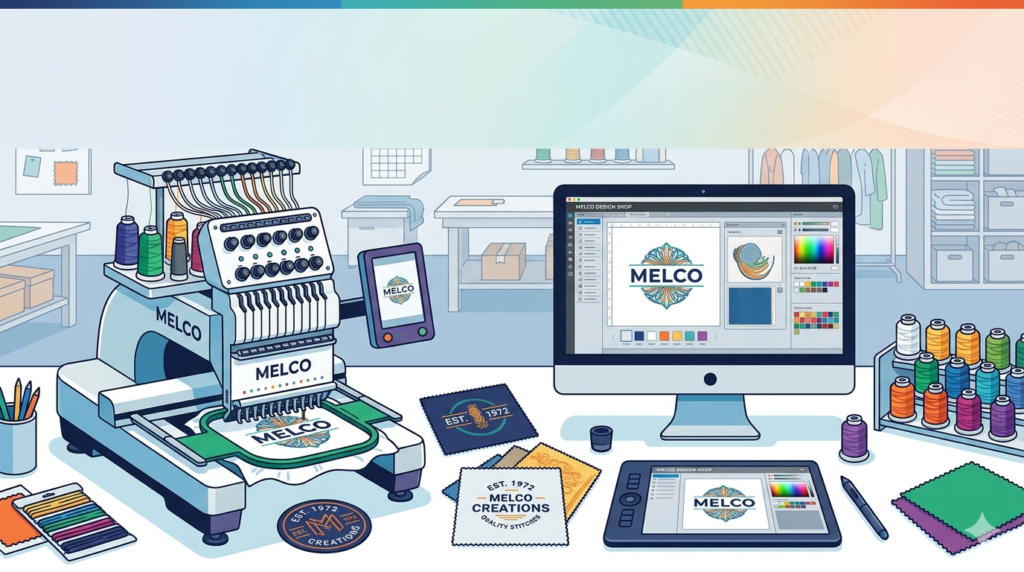
Melco Design Shop 12.1.1 is a professional-grade embroidery digitizing software developed by Melco, a leading name in the embroidery technology sector. Unlike basic conversion tools, this software allows users to create, edit, and optimize vector-based embroidery designs from scratch. Version 12.1.1 continues Melco’s legacy of bridging the gap between graphic design and machine embroidery, offering a robust platform for creating production-ready embroidery machine files such as .DST, .PES, and .EXP.
This software is specifically engineered for users of Melco embroidery machines but maintains broad compatibility with multi-brand machinery via standard file exports. Whether you are a contract embroiderer or a small business owner, Design Shop 12.1.1 provides the vector drawing tools and stitch processing algorithms necessary to transform logos and artwork into high-quality thread paths.
Key Features
-
Advanced Vector Drawing Tools: Native support for bezier curves, ellipses, and polygons to trace complex logos with precision.
-
Auto-Digitizing Engine: Converts raster images (JPEG, PNG, BMP) into editable stitches with controllable density and underlay settings.
-
Stitch Editing Suite: Manual control over stitch angles, pull compensation, and trims to eliminate thread breaks.
-
TrueView™ 3D Rendering: Realistic on-screen preview of how the final sew-out will look on fabric, including fabric distortion simulation.
-
Multi-Head Machine Support: Direct output for Melco EMT 16 and Bravo series machines without intermediate file conversion.
-
Font Manager: Includes a library of lettering styles with kerning controls for monograms and text-based designs.
-
Color Sequence Optimization: Automatically reorganize color blocks to minimize thread changes.
What’s New in the Latest Version (12.1.1)
The 12.1.1 update focuses on stability and workflow acceleration. Key improvements include:
-
Improved Auto-Digitizing for Low-Contrast Images: Enhanced edge detection algorithms now handle gradients and shadows more effectively.
-
Faster Redraw Rates: The rendering engine is optimized for complex designs with over 100,000 stitches, reducing lag on mid-range Windows PCs.
-
Expanded Font Library: Added 15 new built-in embroidery fonts, including sans-serif and script styles.
-
Bug Fix: Resolved a rare issue where certain .CND files would fail to export correctly for older Melco machines.
System Requirements
Before installing Melco Design Shop 12.1.1, verify your workstation meets these specifications:
| Component | Minimum Requirement | Recommended Requirement |
|---|---|---|
| Operating System | Windows 10 (64-bit) | Windows 11 Pro (64-bit) |
| Processor | Intel Core i5 (8th gen) | Intel Core i7 (12th gen) or AMD Ryzen 7 |
| RAM | 8 GB | 16 GB or more |
| Graphics | DirectX 11 compatible, 1 GB VRAM | Dedicated GPU with 4 GB VRAM (NVIDIA Quadro) |
| Storage | 2 GB available SSD space | 4 GB NVMe SSD space |
| Display | 1920 x 1080 resolution | 1920 x 1080 or higher, 15.6-inch+ |
| Other | USB port for license dongle | USB 3.0 port |
Note: This software is not natively compatible with macOS or Linux.
Installation Guide
Follow this step-by-step procedure to install Melco Design Shop 12.1.1 legally and safely:
Pre-Installation Steps
-
Uninstall any previous versions of Design Shop to avoid registry conflicts.
-
Temporarily disable Windows Defender (re-enable after installation).
-
Connect your Melco USB hardware lock (license dongle) to a USB port.
Installation Procedure
-
Download the official installer from the Melco authorized portal (do not use third-party sites).
-
Right-click the
Setup_DesignShop_12.1.1.exefile and select Run as Administrator. -
Accept the End-User License Agreement (EULA).
-
Choose the “Complete” installation type.
-
Wait for the driver installation for the USB dongle.
-
Click Finish and restart your computer.
First Launch Activation
-
Enter the 25-character license key provided with your purchase.
-
The software will verify the USB dongle. No internet connection is required after initial activation.
How to Use the Software
Basic Workflow for Logo Digitizing
-
Import Artwork: Go to
File > Importand select your logo (vector PDF or high-contrast PNG preferred). -
Set Hoop & Fabric: Under
Design Properties, select your hoop size (e.g., 4×4 or 6×10) and fabric type (e.g., pique knit, denim). -
Auto-Digitize: Click the
Auto-Digitize Wizard. Adjust the minimum stitch length to 0.4mm for fine details. -
Manual Refinement: Use the
Stitch Editorto change the fill pattern from tatami to satin for borders. -
Simulate: Press
F12for TrueView simulation. Look for pull compensation warnings (red areas). -
Export: Go to
File > Export Machine File. Select.DSTfor Tajima or.PESfor Brother. Save to USB.
Pro Tip for Reducing Thread Breaks
Navigate to Settings > Stitch Parameters. Increase the Pull Compensation value by 0.2mm for knit fabrics and reduce the Max Stitch Length to 12mm. This simple adjustment can reduce thread breaks by up to 40%.
Best Use Cases
Melco Design Shop 12.1.1 excels in specific commercial and creative scenarios:
-
Corporate Apparel Digitizing: Converting complex company logos (including small text and gradients) into clean sew-outs on polo shirts.
-
Sports Uniforms: Creating 3D puff foam designs and tackle twill simulations for varsity jackets and team jerseys.
-
High-Density Embroidery: Programming tight, overlapping stitches for caps and structured hats.
-
Monogramming Businesses: Rapidly generating custom monograms using the built-in font engine for wedding gifts and towels.
-
Contract Digitizing: Preparing
.DSTfiles for resale to other embroidery shops who do not own digitizing software.
Advantages and Limitations
Advantages
-
Industry-Standard Output: Exports are recognized by virtually all commercial embroidery machines (Barudan, Tajima, Happy).
-
Pull Compensation Logic: One of the most accurate fabric distortion algorithms available under $2,000.
-
No Subscription Fees: Perpetual license model (one-time payment).
-
Direct Machine Control: Connect via Ethernet directly to Melco EMT 16 heads for production monitoring.
Limitations
-
Windows Only: No native macOS version (requires Parallels or Bootcamp).
-
Steep Learning Curve: Casual users need 10–15 hours to master manual stitch editing.
-
Hardware Dongle Required: Losing the USB dongle requires a costly replacement.
-
Limited 3D Puff Tools: Competitors like Wilcom offer more advanced foam pathing tools.
-
No Cloud Collaboration: Files are saved locally only; no team-based cloud workspace.
Alternatives to the Software
If Melco Design Shop 12.1.1 does not meet your specific needs, consider these legitimate alternatives:
| Software | Best For | Platform | Starting Price (USD) |
|---|---|---|---|
| Wilcom EmbroideryStudio e4 | High-end fashion digitizing | Windows | $2,500+ |
| Hatch Embroidery 3 | Beginners and hobbyists | Windows/Mac | $1,099 |
| Embrilliance Stitch Artist Level 3 | Mac users and lettering | Mac/Windows | $499 |
| Ink/Stitch (Open Source) | Budget-conscious users (manual digitizing) | Windows/Mac/Linux | Free (Donationware) |
| SewArt | Auto-digitizing only (no manual editing) | Windows | $159 |
Frequently Asked Questions
Is Melco Design Shop 12.1.1 compatible with non-Melco machines?
Yes. While optimized for Melco, the software exports standard machine file formats including .DST, .PES, .EXP, and .CND, which run on Tajima, Brother, Barudan, and Happy machines.
Can I upgrade from a previous version to 12.1.1 for free?
Melco typically provides free minor updates (e.g., 12.0.x to 12.1.1) for users with an active maintenance plan. Major version upgrades (11 to 12) require a paid upgrade fee. Check your Melco account portal.
Does the software require an internet connection to run?
No. After the initial activation, Melco Design Shop 12.1.1 works entirely offline. Only the license validation at startup is local via the USB dongle.
What image formats can I import for auto-digitizing?
You can import JPEG, PNG, BMP, TIFF, GIF, and vector formats including AI, EPS, CDR, and SVG. For best results, use a 300 DPI PNG with a transparent background.
How do I fix “stitch density too high” warnings?
Reduce the Fill Density value in the Properties panel from 4.0 to 3.5 stitches per mm, or increase the Stitch Spacing to 0.45mm. High density causes fabric puckering and needle breaks.
Can I run Design Shop 12.1.1 on a Mac?
Not natively. You must use virtualization software such as Parallels Desktop or VMware Fusion with a licensed copy of Windows 11 ARM. Performance is acceptable for designs under 50,000 stitches.
Is training available for the software?
Yes. Melco offers free video tutorials inside the software via the Help > Training Videos menu. Paid one-on-one coaching and official certification courses are available through authorized Melco distributors.
What is the difference between auto-digitizing and manual digitizing?
Auto-digitizing converts images automatically (fast but requires cleanup). Manual digitizing requires you to place each stitch node by hand (slow but produces professional, production-ready results). Melco Design Shop excels at hybrid workflows.
Final Thoughts
Melco Design Shop 12.1.1 remains a formidable choice for embroidery professionals who prioritize machine control and file reliability over flashy auto-digitizing. While it lacks the cloud features of newer SaaS tools, its offline, perpetual license model and exceptional stitch editing toolkit make it a sound long-term investment for commercial embroidery shops.
For Melco machine owners, this software is essentially mandatory to unlock the full potential of your hardware. For non-Melco users, the stable .DST export and pull compensation tools justify the price point when compared to subscription-based alternatives. If you are willing to invest 10 hours into learning the manual stitch editor, you will produce sew-outs that are cleaner, flatter, and more durable than any fully automated solution.
Premium Software Support Service
If you need professional help with software installation, setup, or technical configuration, our team is available to assist you.
Contact & Support
For quick assistance and latest updates, connect with us using the links below:
🔹 Direct Telegram Support
https://t.me/PlayoutKing
🔹 Official Telegram Updates Group
https://t.me/yourgroup
Service Policy
- Remote testing available through AnyDesk before confirmation.
• Verify the setup and performance before completing the order.
• Support available for single or multiple systems.
• Step-by-step guidance to ensure smooth installation and working environment.
Our goal is to provide reliable technical assistance so your software runs smoothly without interruptions.